Showing posts with label Spa. Show all posts

HOW TO: PARTY MAKE-UP IN 9 EASY STEPS


Your outfit and accessories for the party are all set and the right shoes have been found. So the time has come for that last finishing touch: make-up! RMS Beauty's makeup helps you to create ultra-feminine looks that accentuate your best features ánd nourishes your delicate skin at the same time! What else could a girl ask for? We'll show you two stunning looks - just in time for the holiday season!
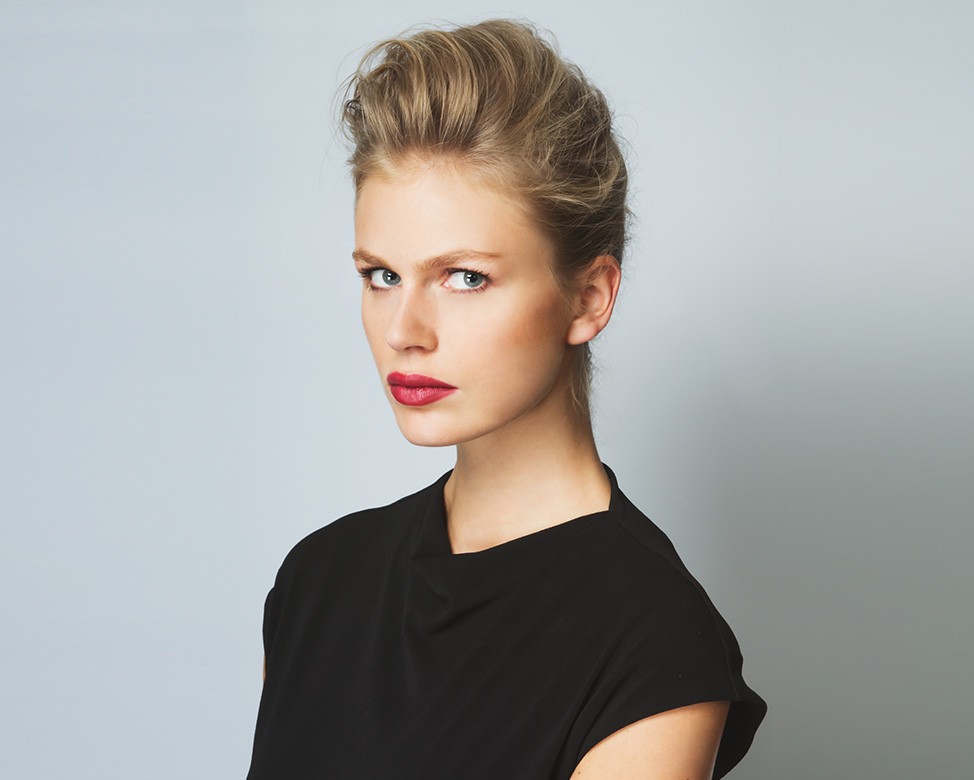


Today the second look: Almost nude eyes with seductive lips

Refined base:

1. Apply RMS Beauty's 'Un' cover-up (in a matching skin tone) with a foundation sponge and blend using your fingers.
2. RMS' 'Un-powder' facial powder offers nourishing components and comes in a color neutral version - perfect for all skin tones! Loosely apply with a large powder brush.
3. Finish your perfect base with a touch of color using a blend of two colors of RMS' Lip2Cheek. Apply the colors Smile and Curious with your fingers and blend till the right hue is achieved.


Subtle shine on the eyes

Use an eye-shadow base before following the steps below.

4. Use fingers or a brush to apply a blend of RMS Beauty's Eye Polish in the colors Lucky and Magnetic. These products contain natural minerals that work as a nourishing moisturizer.
5. Darken your lashes with the Defining Mascara from RMS Beauty.
6. If you wish you can finish with a subtle line around the eyes using a kohl pencil - preferably in warm tonal hue.


The finishing touch

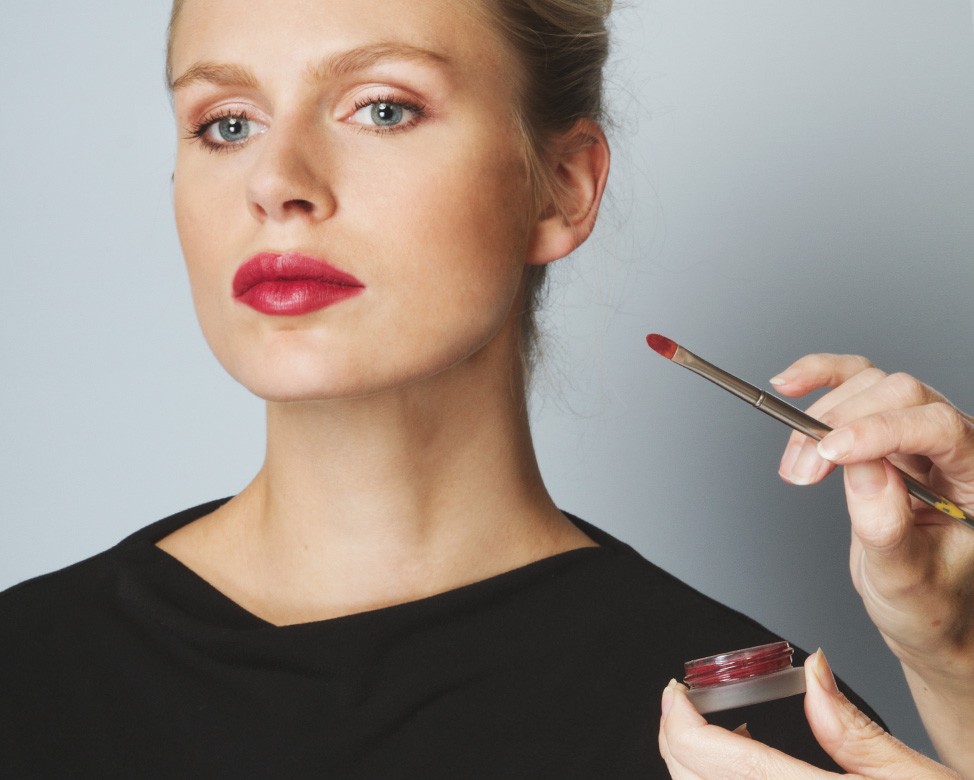
7. We've used RMS' Lip2Cheek in the color Illusive, topped off with Lip Shine in the color Content. Both products take care of your lips with added vitamins and nutrients!
8. A beautiful glamorous finishing touch is only a step away with the Beauty Luminizer from RMS. Apply underneath the eyebrows, on the cheekbones and a tad on the forehead. Blend with your fingers for a naturally highlighted result.
9. Fixate your look with COOLA's Makeup Setting Spray - for a beautiful look that lasts.


Best 25 Eye Makeup Tips For Beginners


Whether you’ve been a dedicated makeup enthusiast or you are someone who’s just starting out with makeup, when it comes to the eyes, makeup can be a little tricky. There’s no harm in having a few tricks up your sleeve so you can work that magic and achieve eye makeup that is so on-point. We’ve put together a list of 25 simple eye makeup tips for all the beginners out there who have been overwhelmed by all that they come across in the world of makeup.


Worry not, we’ve got your back! Just keep these simple tips on top of your mind when you’re doing your eyes, and you will go straight from being a novice to a Pro.

Simple Eye Makeup Tips For Beginners

  • Eyeliner Tips
  • Mascara Tips
  • Eyeshadow Tips
  • Eyebrow Tips


1. Eyeliner Tips


Eyeliner may or may not be a staple for you, but it is one of the most basic steps of doing your eye makeup. It gives you the freedom to work on the shape of your eyes, emphasize them and fill in any sparse looking lashes. It depends on the texture of the eyeliner and your preference as to how you’d like to apply this – clearly defined or smudged – it looks great either way.

Let’s take a quick look at some of the tips and techniques for this step.

  1. Ensure your eyelids are clean and then apply a primer on them, so the eye makeup does not smudge and stays on for longer.
  2. To make your eyelashes look denser, apply the eyeliner as close to the lashline as possible so it appears to be a part of your natural lash line. This is called tight-lining. Make a dotted line from the outer to the inwards corner and connect the dots (you can use a stiff slant brush to blend the dots out into an effortless soft line).
  3. Make sure the tip of your liner is thin but blunt to achieve precision and so you get the perfect shape. You can also freeze your eyeliner before sharpening to keep it from crumbling.
  4. To accomplish the perfect winged eyeliner, use a liquid liner – start on the lash line at the pupil and work your way towards the corners. If your hand is not steady enough for liquid liner then the first line your eyes with a pencil liner, then trace over it with your liquid liner.

(If you’re in a rush, you should just skip the liquid liner in your best interest!)

  1. To accomplish a smoky eye, opt for a pencil liner as these tend to be softer and creamier. Also, you can smudge it out using a smudging brush for that effortlessly cool smoky eye.
  2. As you age, opt for more subtle colors like brown for a more elegant look and apply mascara to complement the simple look.


Note: Always tilt your face up and look down as you apply eyeliner. Doing this ensures you achieve symmetry.

2. Mascara Tips


Don’t you agree that mascara completely transforms your eyes, giving you that extra oomph? The magical mascara wand makes you look bright-eyed and youthful. It’s a total game changer and the only kind of drama that I like.


Here are some important tips for bang-on mascara application.

  1. Always start applying your mascara from the roots of your lashes and wiggle your way to the tips. Doing this instantly volumizes your lashes and does not weigh them down.
  2. After applying one coat of mascara, wait for about ten seconds to go in with a second coat (if desired). This way, your lashes don’t get clumpy!
  3. Wipe off excess mascara from the wand on a tissue before applying, so it’s easy to maneuver and won’t clump (you will also avoid the horrid spidery-lashes look).
  4. Before you go in with mascara, always make sure to curl your lashes using a high-quality eyelash curler. When you go in with curling, pinch your eyelash curler at last base and hold it tightly rotating upwards.
  5. The way you hold your mascara matters! Hold your wand horizontally for thicker lashes and vertically (especially for the lower lashes) for a more natural look.
  6. If you want to make your mascara last longer, then stop pumping the wand while pulling it out (this way you are only sending in the air to dry the product out), just swirl it to prevent it from drying out.

Note: For best results, mascara should be the last step of your eye makeup.

3.Eyeshadow Tips


  1. Eyeshadow does the job of adding depth and giving dimension to your eyes. If it’s applied correctly, it makes your eyes look bigger and helps accentuate your eye color. Want some tips?
  2. Invest in high-quality products and brushes. They will go a long way besides ensuring proper application and blending.
  3. If you want your eyeshadow to stay put all day and not crease beside wanting the eyeshadow color to really pop out – use a good primer before you go in with the eyeshadow.

On the other hand, if you want to make a less pigmented eyeshadow look vibrant and poppy, cover your eyelid with a white eyeliner first. This helps to cancel out the color of your skin and it creates an even base for your eyeshadow.
  1. For the bottom area of your eye (that is just near the lash line) – use a dark shade of eyeshadow, for the area above that, use a medium shade and for the top, use a light shade and blend them well.

4.Eyebrow Tips


Eyebrows are often underrated, and I can’t begin to stress how important they are to provide a structure to your face. Well groomed brows are indeed a game changer, they frame the eyes and them drastically ‘up’ your beauty quotient. If you are someone who has over-plucked them, then worry not, because just a little bit of added definition will make a big impact!


Want some tips?

  1. There are various brow products available in the market. Pick a shade that best suits your hair color and fills in any gaps using the product.
  2. The most important thing to remember while defining your eyebrows is to keep the look as natural as possible. For this – make sure to blend the product out properly to avoid any harsh lines and such.
  3. Use a subtle highlighter right beneath the brow, under your arch to show off the shape and to add height to your brows.
  4. If your eyebrows are out of control, use an eyebrow gel to keep them in place. They also tend to look a lot better and groomed with just a little bit of that gel.
  5. Do you want to know the best trick in the book? For a bolder look, use an angled stiff brush and wet it before you fill your brows in with matte brown eyeshadow.

Some Other Eye Makeup Tips For Beginners


  1. To avoid your base from ruining due to eyeshadow fall-out, finish your eye makeup first and then proceed with the base to ensure your makeup looks fresh.
  2. If you are planning to wear loud eye makeup, keep the lips subtle. It’s always best to emphasize one feature at a time.
  3. To make your eyes look brighter and youthful, highlight the inner corner of the eyes with a light color of eyeshadow.
  4. If you want to instantly curl your stubborn lashes, use a blow-dryer on your curler (ensure it’s not too hot) before you curl them – this way, they will stay curled for longer.
  5. If you’ve got an excess product, say eyeshadow, use a blotting paper to remove the excess eyeshadow without disturbing the eyeliner.

Those were some really simple eye makeup tips and hacks for every beginner out there who have been overwhelmed by the world of makeup. These tips cover all the basics and hopefully, you will keep some of these pointers in mind the next time you’re doing your makeup.

Now that you have some tricks and techniques of how to put these products on, it’s time you learned a thing or two about how to remove eye makeup too. It’s critical for you to take off every bit of makeup at the end of the day to ensure your eyes and skin remain healthy. There are a lot of ways to remove waterproof, stubborn makeup. Let’s look at a few easy ways to remove eye makeup.


10 Things Women With Clear Skin Do Every Day, According to Dermatologists


Clear skin: we all want it. But, between hormones, pollution and other pore-clogging aggressors waiting to wreak havoc on our complexions, achieving a clearer, blemish-free complexion can seem like an impossible feat. Fortunately though, according to dermatologists, it’s totally attainable, but it does require a few lifestyle changes to get your skin right back on track. To find out for ourselves what women with clearer skin do (almost) every day, we sought the advice of two top dermatologists. See their expert tips below.

1. They Cleanse With a Sonic Cleansing System


If you want clear skin, you’re going to have to cleanse better. According to a board-certified dermatologist and author of Skin Rules: Trade Secrets from a Top New York Dermatologist, Dr. Debra Jaliman, a sonic cleansing system is the best way to start, “as it takes off more dirt, bacteria, and makeup from your skin.” In addition to providing the skin with a deep cleanse, sonic cleansing brushes exfoliate the surface of the skin, leaving it looking and feeling softer and smoother, thus revealing a more clear complexion.

Try: FOREO LUNA™ mini

2. They Use Mild Cleansers


On top of cleansing your complexion with a sonic cleansing system, Dr. Jaliman suggests switching to a mild cleanser. If you are experiencing breakouts, a mild cleanser allows you to cleanse your complexion thoroughly without stripping the skin of its natural oils. Stripping the skin of its natural oils can often lead to an increase in oil and more breakouts. Since mild cleansers are more gentle on the skin, you can follow up your regimen with a stronger acne product that targets breakouts.

Try: Glytone Mild Gel Cleanser

3. They Apply Topical Retinoids Before Bed


If you are experiencing a bout of acne, board-certified dermatologist and Director of Clinical Research at the Laser & Skin Surgery Center of New York, Dr. Jeremy Brauer suggests giving topical retinoids a try. Applying a topical retinoid made from antioxidant-rich vitamin A to your complexion as part of your nighttime routine can help to unclog follicles and in turn, may help acne treatments work better and faster.

Try: Avene Retinal 0.1 Intensive Cream

4. They Go Hands-Free


We hate to break it to you, but your cell phone could be the reason for your breakouts. According to Dr. Jaliman, the bacteria on your phone will cause breakouts. Her solution? “Don’t rest your phone against your face, use earbuds instead!” In addition to earbuds, you should also consider wiping your phone down with a disinfecting wipe or cotton pad dampened with rubbing alcohol.

5. They Don’t Pick, Poke or Pop Pimples


We know you’ve probably been told this a thousand times, but we thought one more reminder wouldn’t hurt. According to Dr. Brauer, picking, poking and popping your skin will not get you the results you’re looking for. If you have a pimple that you’re desperate to pop, try applying a spot treatment or pimple cream to the affected area instead of picking. After all, pimple creams are designed for this sort of skincare woes.

Try: Kate Somerville EradiKate Acne Treatment

6. They Skip the Junk (Most of the Time)


As much as we hate to admit, we’re all a little guilty of splurging on junk food every once and a while. And while it may be satisfying to our cravings, junk food is not beneficial for our skin. Dr. Jaliman suggests cutting down your processed food, sugar, and dairy intake since those can lead to breakouts and recommends “eating a diet rich in antioxidants instead.” That being said, you can still succumb to your sweet tooth with a healthy sweet, like antioxidant-rich fruits and berries.


7. They Get a Good Night Sleep


Easier said than done, right? But, for the sake of clear skin (and your sanity), Dr. Brauer says to make it a point to get a better night’s sleep. When you sleep, the skin works to restore itself through a process called regeneration and lack of sleep can lead to a tired-looking complexion, dark circles, puffy under-eye bags and sometimes even breakouts. Whether this means turning your phone or TV off an hour earlier than usual, taking a relaxing bubble bath before bed, or giving meditation a try, you’ll be glad you did!

Try: Perricone MD Sleep Booster Whole Foods Supplements


8. They Use a Clay Mask


Need a facial but don’t have time? Dr. Jaliman suggests treating your complexion to a weekly at-home clay mask facial. You can use your favorite bentonite-infused face mask or create your own! To DIY your own clay mask, Dr. Jaliman suggests combining two tablespoons of all-natural calcium bentonite clay powder with one tablespoon of water and one tablespoon of honey to form a paste. Apply it onto the skin and let it work its magic for 10 to 15 minutes before rinsing off with a warm washcloth. Pat the skin dry and voilà! “This will leave your skin feeling smooth, yet hydrated,” says Dr. Jaliman.

Try: GLOWBIOTICS MD LET ME CLARIFY Probiotic Purifying Clay Mask


9. They Use a Toner


If you aren’t already using a toner in your morning and evening skincare routine, now is the time to start. Dr. Jaliman suggests choosing “a toner with glycolic acid or salicylic acid to unclog the pores for clearer skin.” In addition to promoting clearer skin, toners can also balance the skin’s natural pH level and soothe your complexion.

Try: SkinCeuticals LHA Solution


10. They Don’t Skip Out on Sunscreen


When it comes to breakout-prone skin, finding a sunscreen that works with your skin type and doesn’t cause new blemishes is actually easier than you may think. Dr. Brauer suggests choosing a broad spectrum, meaning an SPF that will protect your skin from both UVA and UVB sun rays.


Best Beauty Care Salon in Lucknow.
Beauty Parlour in Lucknow.


How to Clean Your Makeup Brushes: A Step by Step Guide


Half of getting what you want from your makeup boils down to how efficient your makeup tools are. We’re talking about your eyelash curlers, your sponges and of course, your makeup brushes. These tools are only as good as how diligent you are at taking care of them. “Clean makeup brushes are essential for a flawless makeup application and maintaining brush function,” says Kayla Casciano, makeup expert and education executive at Sigma Beauty. “Product buildup in your bristles causes makeup to apply unevenly and wastes product. Not to mention, not cleaning your makeup brushes regularly can cause mold and bacteria, which can aggravate blemishes and breakouts.”

Need advice on how to give your makeup brushes some TLC? We asked Kayla for some tips.

How often should we clean our brushes?


Kayla: Ideally, everyone should wash their brushes once a week if you use them regularly. Of course, very few people actually do it that often. That’s why Sigma Beauty invented the Sigma Spa® brush care line, the Sigma Dry's Shape® tools and most recently, our SigMagic™ Brushampoo™, which the beauty world went nuts over! Every-one of these helps cut down the time and effort that goes into brush washing so the chore isn’t so daunting.

How should we store our makeup brushes to make sure they last longer?


Kayla: It depends on the size of your collection, but overall you don’t want to smash the bristles, which can change the shape and function of the brush. For smaller collections, we recommend storing them in a cup, bristles up, where they won’t get dusty. The bestselling Brush Cup Holder is the perfect solution, it can be two cups or snapped together around your brushes creating a case. For larger collections, a Brush Case is best. They hold each brush in place without damaging the bristles and are easy to flip through when you need that one crucial tool.

How should we clean our makeup brushes?


Kayla: With proper care, Sigma brushes will last well beyond their two-year warranty and every beauty enthusiast can build their collection as skills and trends develop. Just remember, keeping them clean is important in protecting all the money you spend on makeup brushes.


Here’s how to clean your makeup brushes the right way:


STEP 1: Wet Just the Bristles


As with washing your hair, the first step is to wet just the bristles of your brush. Run the tips of your brush under lukewarm water without getting the ferrule—the part where the handle meets the bristles—wet. This is to avoid loosening the glue that holds your brush together. Another important thing to remember: Don’t ever submerge your brushes in water!


STEP 2: Wash With a Gentle Brush Cleanser


Dispense a small amount of gentle shampoo or brush cleanser onto the bristles and then swirl it on your hand. For this task, we like using SigMagic™ Brushampoo™ because it’s formulated with all-natural ingredients, like virgin coconut and palm oil, so it’s 100% gentle on our brushes.

TRY: Sigma also carries a range of brush-cleaning mats, which features patented textures to get every nook and cranny of your brush. If you’re using any of these mats, swirl your brush on the WASH texture of the mat for a much deeper clean.


STEP 3: Rinse Thoroughly


Run the soapy bristles under lukewarm water. If you’re using the Sigma Brush Cleaning Mat, sweep the brush back and forth where it says RINSE under running water until the water runs clear.

If you feel that your brush could use another round, repeat steps 2 and 3, but instead of WASH and RINSE, use the REFINE and REFINE PLUS textures of your mat for a maximum clean.


STEP 4: Squeeze and Dry


Gently squeeze out any excess water from the bristles and lay your brush flat on a clean towel or cloth to dry. If you’ve got Sigma’s Dry’n Shape Spa, even better! This handy tool allows your brushes to dry more quickly while maintaining the shape of your brushes.


READERS—Got any brush-cleaning hacks you’d like to share? We’d love to hear them! Tell us in the comment section below!


6 Different Types of Cleansers for Every Skin Type


Hello ladies,

Today, we would be talking about different types of cleansers available in the market. There are several alternatives to soap and water and one such option is using cleansers. All the cleansers are basically a mixture of oil, wax, and water but, manufacturers modify the formulations to suit different skin types.


1. Gel Cleanser:


Gel cleansers are generally suitable for combination and oily skin as it penetrates deep into the skin and prevents breakouts as well. Most of the gel cleaners do not foam a lot but, they provide a decent amount of lather to remove the toxins and dirt from the face. Due to the gel-like texture, many of them are not convinced that the skin is clean but actually, it cleanses your skin deeply and prevents accumulation of oil on the face.


2. Cleansing Milk:


Most of them use cleansing milk as a makeup remover but not as a cleanser. However, cleansing milk is a humble and polite type of skin cleanser which helps to deep clean your pores and also hydrates your skin well. Cleansers are generally made of milk extract which helps to keep your skin soft, smooth and hydrated. Cleansing your face with a cleansing milk can help to control sebum secretions. However, you may need to double cleanse after using a cleansing milk. If you feel your skin is clean and happy, skip the process of double cleansing.


3. Self-foaming Cleanser:


Self-foaming cleansers are good for normal, combination and oily skin. People with extremely dry, sensitive or skin with eczema should stay away from self-foaming cleansers. The self-foaming cleanser is also known as an environment-friendly product as you need less amount of water to rinse. Due to ultra smoothing forms, it is extremely good to use the self-foaming cleansers. People with very dry skin should avoid using self-foaming cleanser as it may dry out your skin too much.

4. Exfoliating Cleanser:


Exfoliating cleanser is extremely good for all types of skin except for women with sensitive and very dry skin. Exfoliating cleanser is also known as a 3 in 1 product as it helps to deep clean the skin, exfoliate it well and also removes the makeup thoroughly. This cleanser is one of the best cleansers that can be used to remove makeup. Depending upon the ingredients, an exfoliating cleanser should not be used on a daily basis.


5. Multi-task Cleanser:


The multi-task cleanser is suitable for all skin types and is used as a hydrating product as well. Using a multi-task cleanser helps to remove heavy makeup and also work as an excellent hydrating product. It is extremely light and hydrating on the skin. Even if you don’t want to remove makeup using this, you can also use this on bare skin to keep your skin hydrated and clean. However, you should skip using a toner after using the cleanser.


6. Foaming Cleanser:


Foaming cleanser is extremely good for women with a combination and oily skin. Using a foaming cleanser is extremely soothing as it helps to clear out the skin and also moisturizes the skin. People with oily skin can have a better luck with foaming cleansers as they are particularly made to remove dirt, sweat, sebum, bacteria and also helps in moisturizing the skin. Foaming cleansers are easy on pockets as just one tube of cleanser can last for months together.


Source

Best 10 Different Types of Essential Oils to Enhance Your Skin


Hiii Beauties,

Using oils in your skin care regimen has become very common these days. But, we all stick to the basic oils like – castor, olive and coconut and that’s it. But do you know that there are tons other essential oils which can be used to beautify and do justice to your skin?


Come, let’s have a look at the list given below and know how to include these new and different types of oils in your skin and beauty stash;

1. Jojoba Oil:


This is the most lightweight oil you can ever use. It gets absorbed into your skin in a jiffy and controls excess oil and sebum production. It is a boon for all the oily skinned girls.

2. Rosehip oil:


It is dry oil that penetrates deep into your skin. It enters into the deepest layers of the skin, regenerates cells and increases collagen production. The oil is rich in vitamin C, omega 3 and omega 6 fatty acids. But you need to take a word of precaution with this oil. Don’t use it alone on your skin.


3. Tamanu Oil:


This oil with magical properties is known to fade away scars and marks. This oil has unique medicinal properties which have been used since ages in ancient medicines. And just like rosehip oil, this oil is also known to regenerate cells and tissues.

4. Hemp Seed Oil:


If pores and aging skin are your concern. then use this oil. It is known to dramatically reduce pore size and also improve the skin elasticity. This oil is known to eliminate blackheads and acne marks from your face.

5. Grapeseed oil:


Another perfect and versatile oil for your skin. this one is loaded with vitamins like vitamin C and E. It penetrates deep into your skin and heals them.


6. Calendula oil:


This oil made from the goodness of marigold flowers. The oil has unique properties which are known to heal and repair your skin.

7. Ylang – Ylang oil:


This is the essential oil which is a boon for dry skin in winters. It acts as a great moisturizer without making your skin heavy or sticky.

8. Tangerine oil:


This is your oil if you want the young and dewy skin. This one is known to increase the blood flow to your skin. As a result, you wake up to a vibrant and younger looking skin.

9. Patchouli Oil:


You are only aware of tea tree oil for acne breakouts, then you should read this. This oil also works as a fab alternative to the tea tree oil. It takes care of the infections and other skin breakouts dramatically.


10. Cypress oil:


This oil should be your best friend if you have oily skin. This is known to cleanse the skin deeply and bring new and revived look to the skin. It controls excess oil production and thus tightens the skin and reduces pore size dramatically.
So, these were some of the most common face oils to be used. Hope you like the article and start using these oils into your skin care regimen.


Best Bridal Makeup Services in Lucknow

Best Beauty Salon in Lucknow


Source

Best 5 Different Types of Kajal You Can Make at Home


Hello girls,

Hope you all are doing well. Today, we would be talking about different types of kajal you can make at home. Girls are generally divided into two categories – girls with kajal and girls without kajal. So, if you are a kajal lover, then you have landed at the best place. I’m obsessed with kajal, and love my eyes with heavy kajal, around the borders. It benefits my eyes in several ways and makes it look attractive as well. There are different brands of kajal available in the market and if you are someone who is never satisfied with other brands, here is how to make kajal at home.


You need few things to make Kajal at home. Try them out here.

1. Charcoal Kajal


You will need:

  •  Activated charcoal capsules
  •  Coconut oil


Method:

You need to empty the charcoal capsules in an empty vessel. Make sure the vessel is sterilized so that it does not affect your skin in any way. Now add some coconut oil and mix it using a Q-tip. About the amount of coconut oil, there is no specific quantity to do that, you can add according to your preference so that the charcoal converts into a paste. Don’t add 2-3 drops of coconut oil, but make sure charcoal is not dry. Blend it properly using the Q-tip and apply using the Q-tip.


2. Almond Kajal:


You will need:

  •  Almond.
  •  Metal Skewer.
  •  Metal spoon.
  •  Candle.


Method:

Light a candle and hold almond near the flame until you feel the heat. Hold the spoon in an inverted position above the almond, so that it will collect the soot. Allow the almond to burn for some time and you can see soot is collecting on the spoon. Now add some coconut oil to the soot and mix it using Q-tip. Almond kajal is extremely easy to make and you can use it on a daily basis.


3. Eyeshadow to Kajal:


You will need:

  •  A powder eyeshadow in a dark color (black if you want the traditional kajal look)
  •  Coconut oil.
  •  Eye primer (colorless version)


Method:
Collect some eyeshadow in a pot, and make sure to crush it well. Add a little of the eye primer according to the consistency required. Now mix both the ingredients well with Q-tip and add some coconut oil and mix them well once again. Most of them prefer using gray or brown color eyeshadow to create a similar color kajal.

4. Revamped Kajal:


You will need:

  • • A kohl/eyeliner pencil
  • • A candle


Method :
Most of the people throw away kajal or kohl because it is not dark according to their preference. Using your old kajal can help to make a new kajal and work as great as new one. Simply light the candle, and then hold the eyeliner or kohl on the flame. Hold the pencil for seconds or two and allow the kajal to cool down. Before you proceed to apply on the eyes, make sure you the kajal cooldown completely.

5. Traditional Kajal:


You will need:

  •  Brass or copper plate.
  •  Two big bowls of the same height.
  •  Diya.
  •  Ghee.
  •  Cotton wick. (make sure it’s pure cotton)


Method:

You need to fill the diya with pure ghee and place a wick in it. Now place the bowl on either side of the diya and light it up. Place the plate (inverted) over the flame, using the bowls as a stand. Make sure there is enough space between the flame and the plate so that the plate does not put off the flame. Allow the diya to use all the ghee and burn completely. Once the ghee is used, remove the plate carefully as it will be extremely hot. Now scrape out the soot or kajal collected on the plate and store it in a clean pot. Now add some ghee to the kajal so that it does not dry. Now your homemade kajal is ready to be used.


Best Bridal makeup in Lucknow.

Bets Parlour For Bridal Makeup Services in Lucknow


Source 

Head-to-Toe Bridal Beauty Prep Guide


          Fashion/Interior Designing Institute in Lucknow.


It's time to get busy and get gorgeous. We go from top to bottom to bring out a beautiful you.
by Joanna Saltz


Wedding-day beauty shouldn't begin on the day-of while you're sitting in the stylist's chair. Start now to ensure you look your bridal best.

Hair


Great bridal locks require a little love and devotion. We all know that washing, blow-drying, and heat-styling on a daily basis makes for a messy head, full of split ends and "wispies" (those little-broken pieces of hair that stick up from your scalp). Start repairing from the inside out. Experts believe that a diet filled with Vitamin B helps bring out your hair's natural shine (dull hair is actually a symptom of a Vitamin B deficiency). Foods like fish, nuts, and eggs will give you a good head start. On the outside, an invigorating scalp massage and deep conditioning treatment (about 4 weeks prior to the event) not only feels good but stimulates the hair follicles and adds body. FYI Despite what many bottles claim, there is no way to repair damaged ends -- once your hair breaks, get a trim.


Face


When it comes to the best way to care for your face, there are many schools of thought but here are a few good pointers for common issues A dermatologist can help those fighting a losing acne battle, by prescribing topical creams and oral pills or administering facial peels to knock out bacteria and oils. Start seeing a derm six months before the wedding-your skin will need to adjust to a new regimen and your body to any new medications. If you're looking to bring a dull complexion to life, an aesthetician at your local spa can provide a series of facials that clear blackheads, slough off dead skin cells, and improve circulation. (Start these visitations six months prior as well and don't dare get a facial within ten days of your wedding.) But the real secret to great skin? Water. Drink tons of H2O before and on your wedding day to make your face look dewy and radiant.

Eyes


Dark circles and puffiness are common bride-to-be afflictions (all those late nights pouring over the seating chart is bound to take a toll, after all). Since the skin around your eyes is particularly sensitive, be gentle take off eye makeup with a water-soluble remover (don't scrub), and keep rubbing to a minimum. A nightly application of eye cream, in combination with adequate sleep, will improve the appearance of dark circles and a cool compress once or twice a week (or as needed) helps keep puffiness at bay. During the days before the wedding, steer clear of too much salty food, which can cause eyes to look swollen.

Lips


For that all-important kiss at the end of the ceremony, you'll want your lips to be in the best possible shape. A Vitamin E stick (sold at pharmacies and health food stores) can combat cracks and creases that weather and nervous lip biting can cause. You should also exfoliate your lips at least once a week, to clear away dead skin Wet a toothbrush with warm water and brush lips with a gentle back-and-forth motion. Finally, protect your kisser with sunscreen, as the sun can leave lips looking -- and feeling -- parched.

Neck and Decollete


Since your gown, no doubt shows off a little (or a lot!) of the neck and decollete, start taking care of this overlooked region as soon as you can. Think of it as an extension of the skin on your face -- but remember that this fragile skin is thinner, has fewer oil glands than the rest of the body, and requires special care to keep it supple and smooth. Exfoliate it with a gentle face scrub every other day, apply a light moisturizer daily, and use sunscreen when heading out in a chest-baring top.

Body


You can get your body in shape without lifting a weight or walk a mile (though both will help relieve stress and whittle away at the inches). From the inside, a daily multivitamin can work wonders on a range of ills -- from digestive issues to sleeping problems to frayed nerves. Vitamins also up your energy factor, making wedding planning easier. On the outside, exfoliation is the name of the game, because it makes skin feel softer and more toned (no gym required!). Use an exfoliator each day, whether in the form of a loofah or a body scrub.

Legs


Your wedding dress might have your legs covered, but that's no reason to ignore them. Shave only after you've softened the skin with warm (not hot) water and use a moisturizing shave cream. One of the simplest rules for keeping them smooth post-shower, apply a rich moisturizer while legs are still damp.

Feet


Sure you'll probably treat yourself to a pedicure before the big day, but you should indulge your feet in sweet treatments in the months leading up to the wedding. Good foot care starts with a little tough love use a pumice stone or foot rasp daily to scrub away dry, cracked skin on heels and toes. Note that feet should be damp, not completely wet -- a sopping foot is too slippery to be properly exfoliated. Then treat your feet while you sleep slather on a thick moisturizer and slip into a pair of socks, which will retain body heat and help seal in moisture overnight. An added bonus to these measures well-moisturized, cared-for feet are less likely to blister in uncomfortable shoes.


Best Fashion Designing Institute in Lucknow.

Interior Designing Institute in Lucknow.


How to Prepare for Wedding Makeup


    Best Beauty Parlour in Lucknow For Wedding Makeup.


Planning a wedding is a lot of work. Brides-to-be have their hands and minds full with thinking about their future ceremony and reception. What to wear, who to invite, who to hire... it can be overwhelming. Therefore, it is very easy to forget about the most important person on that day - themselves! My most important advice I can give to brides is DO NOT forget about yourself and what planning is needed to prep for your big day. For example, if you are planning to tan, get a facial or get waxed, plan it all wisely and in a timely fashion! Do not hold all of that off until the last weekend before the big day.


To ensure the best wedding day makeup application, locking down a good skin care routine is key. This does not necessarily mean spending big bucks on top shelf skincare products, this simply means figure out a routine that works the best for you and your skin! Once a system is in place, stick to it… your skin will thank you.

• Faux Tans: 


Tanning can be a girl’s best friend. However, depending on the product you use, the salon you choose, or the professional you trust… it can be either amazing or disastrous. Reach out to a salon of choice a few months in advance and get a practice tan. This way you can learn what kind of tan suits you the best, and how your skin reacts and holds the color. If you choose to go with a spray tan, give yourself enough time before the actual wedding date to wash the excess tanner from your skin.

• Facial Treatments: 


Just like a good tan, facials are amazing. However, during the post facial period, your skin will undoubtedly react. Depending on skin type and the treatment received, the skin has the possibility of becoming red, irritated, textured, or even begin to peel or break out. The Same rule of thumb applies to facial treatments as it does to tans: schedule a practice treatment in advance to see how your skin reacts! The last thing a bride wants to deal with is a bad skin reaction from a facial prior to her wedding.

• Hair Removal: 


One of the most popular and quickest ways of removing hair is waxing. Regardless of its popularity, waxing is not wise before applying makeup, especially on a day like your wedding. DO NOT wax any area that makeup will be applied. Waxed areas of skin repel all cosmetic products. For example, if the eyebrows were waxing prior to the makeup application, makeup will not stick to the skin around the brows. Although it may sound strange, it is very visible to the eye and especially cameras. If hair removal is needed, threading, tweezing and shaving are the most makeup-friendly methods.

• The Night Before: 


At bedtime, the night before your wedding, make sure to remove all of your makeup, cleanse your skin, and apply your best moisturizers. My absolute favorite product to remove makeup is 100% organic Coconut Oil. Take a nickel sized amount of the coconut oil and massage it into your skin. This will remove ALL makeup, dirt and excess oils. It will also kill bacteria, and leave your skin smooth and subtle. After removing all makeup, cleanse with your favorite skin cleanser and follow up with moisturizer. If available, apply eye cream and lip conditioner. This also would be a good time to pluck any unwanted hairs around your brows, upper lip, and chin. Finally, get some shut eye!

• The Morning of: 


After a decent sized cup of coffee, tea or OJ + champagne, get that skin ready for the day ahead. Cleanse with your favorite cleanser and exfoliate. My favorite skin exfoliators are Laura Mercier Face Polish and MAC Volcanic Ash. Exfoliating in the morning removes all dead skin cells and polishes the skin to perfection for the makeup application. This will allow the makeup to set onto the skin perfectly and smoothly. After exfoliating, apply your favorite moisturizer and eye cream.


This may seem like a lot of rules for makeup, however, it will be that little extra step that makes all the difference. Also, these are good habits to learn for youthful, healthy skin.

Nine steps: How to get the perfect cocktail party makeup


Getting this cocktail party makeup is easier than you think.


Go for shades of bronze or gold for a cocktail party.

With the wedding season on in full swing, the dilemma that most women face is how to glam up well. Getting the perfect makeup to accentuate one’s features and outfit is of utmost importance and while many go into a hyper frenzy, others simply hit the parlor.

Just in case, you want to save yourself all the trouble, follow our cocktail party makeup ‘step-by-step’ guide. Super easy to achieve, not only is this look super sexy but also a great way to save yourself from the embarrassment of ending up with a caked-up face and clumpy eyes!

Here’s how to go about it:


1) Apply concealer under your eyes and blend it well with your fingertips to hide dark circles/eye bags.

2) Use a bronze eyeshadow and blend it across your eyelid in an upward and outward motion, into the crease of your eyelid.

3) Trace the crease of your eyelid with a black eyeshadow and then top off the area above the crease with a pink matte eye shade.

4) Now, apply light gold eye shade only to the inner corner of your eyes.

5) Once, you are done, line your upper lashline with a black eyeliner and then apply some mascara to your upper eyelashes to maximize the effect.

6) Trace your waterline with a nude colored eyeliner/pencil.

7) Apply a little foundation on your face for a dewy effect and then finish it off with some blush on your cheekbones.

8) Use a highlighter on your cheekbones and the T area of your face.

9) Complete the look with a nude lip color, preferably with a hint of pink in it.


Best Bridal Makeup Parlour in Lucknow.
Best Beauty Salon in Lucknow.


Source

How to do glossy makeup for Diwali in 5 simple steps


This Diwali, sport a glossy makeup look for a radiant, gorgeous you!


The festival of Diwali is an absolute favorite with most Indians. The week long festivity, lighting diyas, exchanging sweets, attending card parties, dressing up for the occasion, basically all things festive and vibrant. The lights, the ethnic clothes, the jewelry all add shine and sparkle to the festival. So why not bling up our makeup too? That sounds fun. Doesn’t it? Besides glossy, high shine, luminescent skin is a rage across all fashion circles too. So Zuri brings to you some simple tips on


 how to do glossy makeup for Diwali in 5 simple steps.


1. Prep your skin with a primer: Primer is like an ‘under-makeup’ makeup which can turn even the most dull and drab face into a face shining like the morning sun. Moreover it covers wrinkles and fine lines and also helps your makeup stay put. So, dab on some primer on a clean, moisturized face under your foundation.


2. Next up, mix up a small amount of skin Illuminator to your foundation: And blend it on to your entire face after using a primer for a pearly glow. Skin Illuminators are basically pearlized shimmer creams that reflect light onto the skin making your skin look dewy and luminescent.


3. Gold eye shadow is a personal favorite: For an ultimate festive look, it looks unparalleled for dark eyes. So cover your lid with a metallic, shimmer gold eye shadow uptil the natural crease. Don’t forget to highlight the brow bone with a metallic beige. Follow with a wing tip eyeliner and a coat or two of mascara for a dramatic look.


4. A bold pout: A pout works brilliantly for a festival like Diwali. Go for high gloss lip colors in poppy reds, crimson, plum or even hot pink. Another color to look out for is orange that goes really well with Indian skin tones. Whatever shade you choose, make sure you coordinate it with the color of the outfit you’re wearing. Add a tad bit of gold dust right in the middle of the lips, for that extra bit of sheen. Alternatively, if you’re not to keen on bold lips and want to keep the focus on your eyes, then go for a smokey eye makeup in combination with glossy nudesand pinks for your lips.


5. Sweep some rosy cream blush: Onto the apple of your cheeks, apply cream blush. And now the most important step for a glossy makeup, use a liquid highlighter to illuminate the high points of your face like the cheekbones, bridge of the nose, cupid’s bow and brow bone to give your face a subtle gleam. Here, I would recommend that you choose an Illuminator shade with a gold undertone to go
with the mood of the festival.


And voila! You’re ready to rock the Diwali night with your gorgeous, glowing, glossy makeup.


Best Bridal Makeup Parlour in Lucknow.
Beauty Salon in Lucknow

Source

10 Beautiful Half Up Half Down Prom Hairstyles You Can Try


Girls, preparing to look a million bucks on your big night? Don’t worry. We have got you covered. From half-up braided hairstyle to glam bouffant half updo for the prom princess, we scouted a list of ten half-up, half-down hairstyles for you to rock this season.

So, read ahead, follow these half up half down prom hairstyles to match your dress!

1. Two-Toned Half Updo


At the American Idol Red Carpet, singer Jennifer Lopez looks absolutely striking with this chic half up, half down hairstyle. She sports a pulled back and soft waves in her two-toned blonde hair. Duplicate JLo’s look by pulling your hair back and then securing it with a few hair pins. You can add waves to the bottom of your hair with a curling wand, and finish off with some hairspray to keep the half up-do in place.

2. Wavy Half Updo


Our favorite Blake Lively looks utterly gorgeous with her blonde hair in a half up, half down hairdo. She wears her hair slightly off-center, sporting a long, wispy tendrils on one side. Perfect for prom – this half-up ‘do is very flattering for her oval-shaped face. We also love her messy, healthy hair, which makes her look even more stunning.

3. Twisted Half Up Half Down


Spanish actress Andrea Duro looks ultra-hot with her half up, half down hairstyle featuring a chic twist. We love this elegant look with its sections of hair slicked at the sides, and straight cascading mane over one shoulder.


4. High, Half Updo


Are you in search of cute half up half down hairstyles for prom? Then here you go! Becky G looks charming and carefree with her high, swept back, half up hairstyle. We love this modern half up, half down hairstyle as the hair is swept straight back, an alternative to classic half up-do. You may need to tie your hair high up to keep it in place, and then mist with strong-hold hairspray for a neat finishing touch.

5. Messy Half Updo With Braids


Actress Gillian Jacobs nails two trends in one hairstyle – half updo and side braids. If you have a beautiful wavy hair like Gillian, opt for this messy half up, half down hairstyle with side braids – perfect for a prom or even a date night. Completely Boho!


6. Bun, Bangs And Half Updo


Zooey Deschanel looks effortlessly chic with her wavy half up, half down hairdo. Her bun adds some sass while her soft bangs draw attention to her stunning blue eyes. This is a great prom look, and it’s very easy to execute – leave your bangs out, and then pull back a section of hair behind your head to create a high bun and secure them together.

7. Round Bob Half Updo


Alice Eve looks divine with her honey-blonde hair in a round half up, half down hairstyle. We love her glossy hair, volume at the crown and her gorgeous makeup. To recreate Alice’s look, gather a section of hair, tease it up, pull them back, and secure them behind your head.

8. Half Up Braided Hairstyle


Here comes one of the best half up half down braided prom hairstyles of Naya Rivera’s that we’re totally jealous of!

We love everything about this flirty hairstyle – cool braids on her crown, subtle layers, multicolored streaks and that natural hair texture. Pair this fun hairstyle with bronze skin and brown lips for a youthful and edgy final look.


9. Glam Half-Up Bouffant


The model at the Badgley Mischka Fashion Show keeps her look retro and yet trendy with a bouffant half up, half down hairstyle. With sleek side-swept bangs, the glam hairstyle is versatile and feminine – simply add volume by backcombing your hair at the back, mist your bangs with hairspray and secure it at the sides, et voilà!

10. Half Updo With Headband


Rocking a fancy headband on, what it seems like a retro half-up hairstyle, singer Ariana Grande keeps her entire look trendy and elegant. To mimic her hairstyle, simply tease your hair at the crown, pull your sleek hair back, and adorn a dainty headband to finish your prom hairstyle. Simple and sexy – perfect!

So try out these simple-yet-chic half up half down prom hairstyles at home! Also, let us know how you liked this post! There is a comment box below.


How to Apply Makeup for a Fancy Party


Part 2 


1. Accentuating the Eyes


Apply an eyelid primer. Dip your finger into the primer and apply a thin layer on your upper eyelid, below the crease. This primer will help your eyeshadow last longer, just like the other primer you applied. Allow the primer to absorb into your skin and sit for a minute or so before you apply the rest of your makeup.


2.Choose your colors. 


There are so many different color combinations you can do for fancy makeup. If you are going to a more formal event you may want to stick to browns and grays. If you are going to a fun event you may choose to use a shimmery eyeshadow. If you aren't sure what looks best on you, try out some different shades before your party. It is really your personal preference, but here are some guidelines for eyeshadow colors:[5]

For brown eyes: 
Because brown is a neutral color, you have a lot of options for your eyeshadow. You can go with coppers, purples, and blues. Really, brown eyes can get away with most colors, but usually darker shades look better.

For hazel eyes: 
Pastels and metallics look best for this eye color because they help make light brown eyes sparkle. Heavy shadows can hide the subtle green and gold in your eyes.

For blue eyes: Soft tones like coral and champagne often look best on blue eyes. Very dark, smoky looks can distract from your eye color, so sticking to the lighter shades will draw attention to your eyes without distracting from your eye color.

For green eyes: Because your eyes have so much color, you don't have to use many colors for your eyeshadow to make your eyes pop. Choose eyeshadows in shimmery browns or even a muted purple.
Using a color wheel to find your eye color's opposite is a great way to make sure your eyes stand out. For example, orange is blue's opposite, so eye shadows with orange tones will help blue eyes pop, etc.


3.Apply eyeshadow. 


Start by applying a light, neutral shade of eyeshadow to your upper eyelid, below the crease, and then blend it into the crease with an eyebrow brush. Then, apply a light, shimmery eyeshadow like cream or white to the inner corners of your eyes for an extra highlight. Then, blend a darker shade into the crease of your eye -- you want the color to be one or two shades darker than your eyelid color. Finally, add a dark color right above your crease and blend it into your crease with an eyeshadow brush.

For blue eyes, you might consider using a light champagne color for your eyelid, a peach, coral color for your crease, and a light brown, gold, or darker peach above your crease.[6]

For brown eyes, you have a lot of flexibility. Basically, choose a light color for your eyelids and go darker as you move your way up. Try to stay in the same shades, though (don't use a purple on your crease and a brown above your crease).

For hazel eyes, you can do a light smoky eye, by using a light, shimmery gray above the crease of your eye, or you can do a purple eye. Use a light color on your eyelid, move to a pale or pastel purple on your crease, and then apply a rich purple above your crease (don't go as dark as plum though).
For green eyes, go for a shimmery brown look. Choose a light champagne for your eyelid, fill in your crease with a golden or beige eyeshadow, and then use a shimmery bronze above your crease.
Make sure that your eyeshadow doesn't meet your eyebrow. You want your eyeshadow to end a little bit above the crease of your eye and not any higher.

To achieve a smokey eye look for events especially fancy, start with the lightest tone of eyeshadow in your inner eye (usually shiny whites, peaches, or very light browns), then move across the eye (towards the ears) with every shade getting progressively darker. For example, on a blue eye, you could start with a light white on the inner corners of your eyes, then cover most of your lid with a peach color shadow, and finally adding a darker peach/gold/bronze (or whichever darker color matches the shadows you've used) on the outer corners of your eyes, blending into the outer portion of your crease and around the edges of the outer eye.


4.Highlight your eyes with an eyeliner. 


You can use a liquid or pencil eyeliner on your eyelids. Draw a thin line of eyeliner on your top eyelid above your lash line, starting from the corner of your eye and moving to the end of your eyelid. For a more dramatic line, you can create a wing or cat eye with your eyeliner, drawing the line out past your eyelid half an inch or so.

When doing top eyeliner, it can be helpful to place a piece of tape next to your eye, so that your eyeliner has a nice boundary. Take a piece of scotch tape one inch long, and line it up with the outer edge of your lower eyelid. Place it at an angle so that extends away from your upper eyelid towards the end of your eyebrow.[7]

The color you choose for your eyeliner is up to you. Black is good for a fancy party, but if you have naturally light lashes, a light or dark brown may be better suited for you. You can also choose a fun color like a shimmery bronze or blue if you want to add some glitter to your eyes.

You can use eyeliner on your lower lash line as well, but this often makes people's eyes look smaller. Using eyeliner above your lash line and then accentuating your lower lash with eye shadow will make your eyes look bigger.

A thin slanted eyeshadow/eyebrow brush can be used to help smooth out any eyeliner bumps and perfect that fierce wing. Simply place a small bit of eyeliner onto the tip of the brush and carefully touch up any issues.


5.Apply eyeshadow under your eye.


 This is in place of your under eye eyeliner, or in addition to it. Use a medium shadow (not a white but not a dark gray.. something like a beige or brown) and apply a thin line of eyeshadow from the outer corner of your eye to the middle of your eye with a thin eyeshadow brush. Then, smudge and blend it in with your finger or with an eyeshadow brush.[8]

It is really your personal preference what you want to do under your eyes. Start by applying your upper eye makeup, and if you feel like you need something more than add under eye eyeliner or eyeshadow. If you like the way you look without something under your eye, then leave it at that. You could also choose a fun color for under your eye like a light blue or purple.


6.Apply mascara. 


For the final touches to your eye, choose a mascara suited for your hair color. Dip your mascara brush in your bottle (making sure you don't pump it as this can dry out the mascara) and start at the base of your top lashes, underneath them. Then, wiggle your mascara brush through your lashes. After you have applied one coat, apply one or two more coats until you have your desired color.[9]

Repeat this step on your lower lashes, but apply the mascara to the top of the lashes instead of underneath them.

If you have dark hair, use a black mascara. If you have light hair, try a dark brown or brown mascara. It will still look mostly black on your eyelashes, but won't make your lashes look spidery.
Before you apply your mascara you can use an eyelash curler to add definition to your eyelashes.